


How to Diagnose Bad Ground in Your Vehicle
A vehicle can have a fully charged battery, a good alternator, and no obvious blown fuse - then still crank slowly, flash warning lights, lose power accessories, or refuse to communicate with a scan tool. Before replacing a starter, alternator, module, or battery, learn how to diagnose bad ground connections. A poor ground can imitate expensive failures, and guessing at parts is the fastest way to spend money without fixing the vehicle.
Ground faults are common on older vehicles, vehicles exposed to moisture or corrosion, and vehicles with prior collision, engine, battery, or accessory work. Arizona heat adds its own pressure: battery terminals corrode, wiring insulation becomes brittle, and marginal connections can fail when electrical demand is high. The repair is sometimes as simple as cleaning and tightening a connection. Finding the right connection is the part that requires disciplined testing.
What a bad ground does to a vehicle
Most automotive circuits need a complete path back to the battery negative terminal. That return path may travel through a ground wire, a body panel, the engine block, a transmission case, or a braided ground strap. If corrosion, looseness, damaged wiring, paint, or a weak connection adds resistance, voltage is lost before the component can do its job.
That is why a bad ground creates inconsistent symptoms. A power window may slow down only with the headlights on. A starter may click or crank weakly even after the battery tests good. Gauges may behave strangely, warning lights may appear and disappear, or a radio may reset when the vehicle hits a bump. Electronic modules can set communication codes because their ground reference is unstable, not because the module itself has failed.
A ground problem can also make one system affect another. For example, a weak rear lamp ground may cause turn signals, brake lights, or parking lights to backfeed through an unintended circuit. On newer vehicles, poor engine or chassis grounds can produce a long list of unrelated trouble codes. Those codes are clues, not permission to replace every listed component.
Start with the symptoms, not the parts
The best diagnosis begins by identifying exactly when the problem occurs. Does the vehicle act up only during cranking? When the A/C blower is on high? After rain? When the engine is hot? Does a door lock work from one switch but not another? These details tell a technician which circuit needs to be loaded and tested.
Pay attention to patterns such as dimming headlights during a slow crank, multiple electrical complaints at once, intermittent no-starts, melted or discolored terminals, or a problem that temporarily improves after the battery cables are moved. None of these prove a ground fault, but they justify checking the ground path before condemning major components.
A single failed item does not automatically mean a bad ground. One dead power window could be a failed regulator, switch, motor, broken door-jamb wire, fuse, or control module. Diagnosis has to follow the circuit instead of forcing every symptom into the same answer.
Inspect the main ground connections first
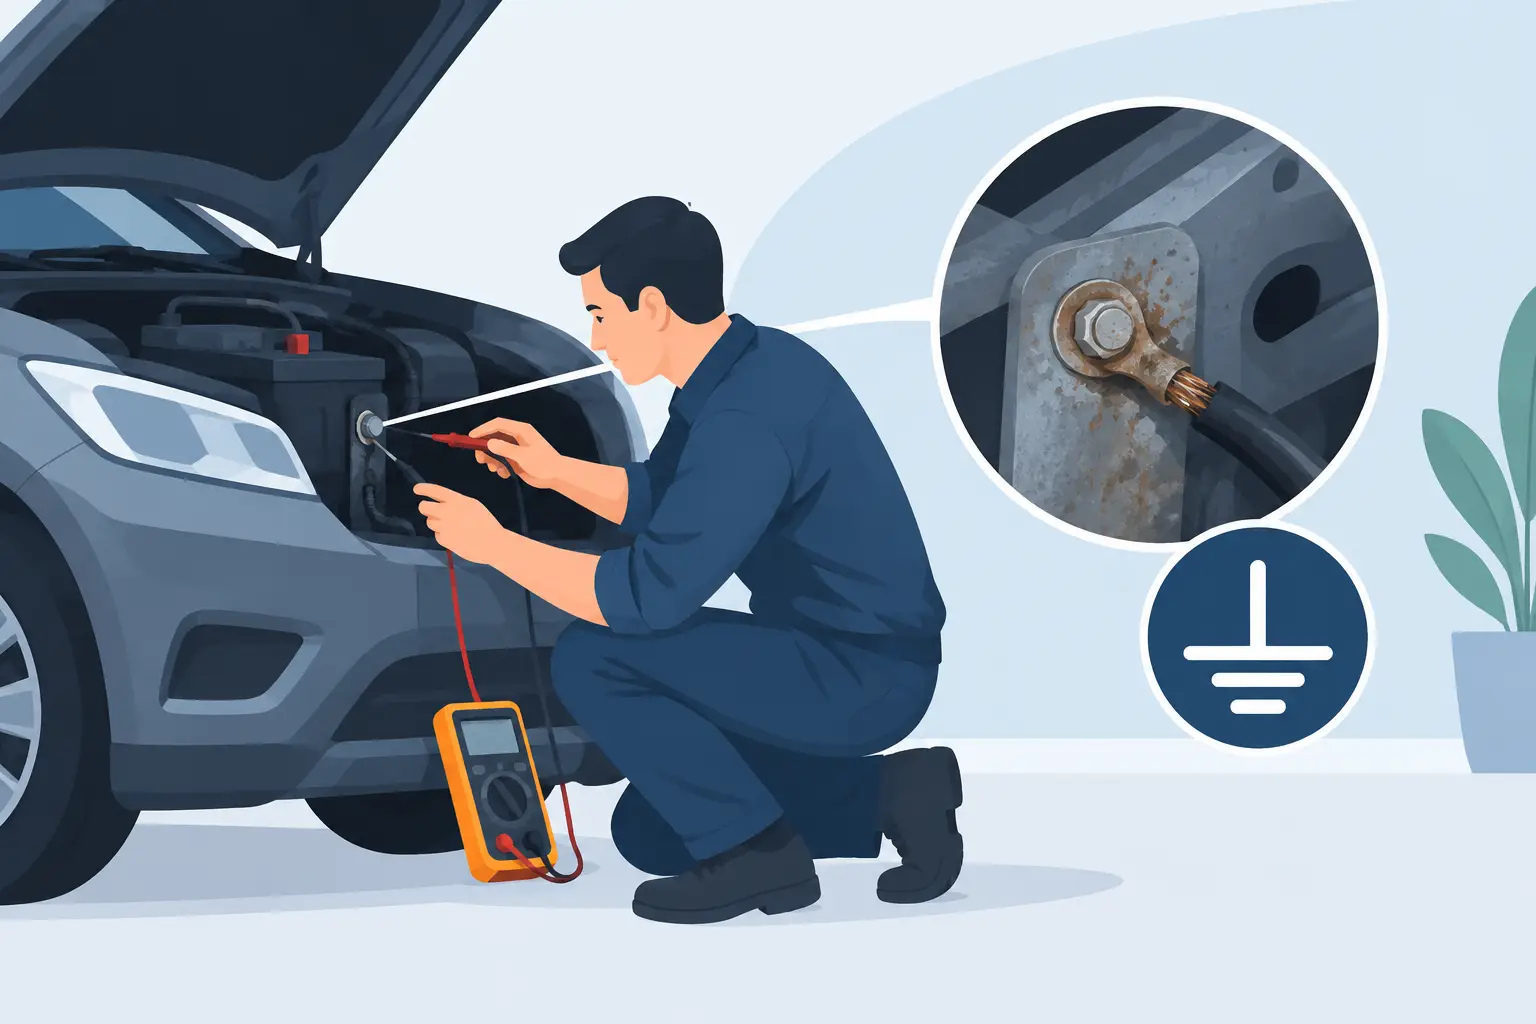
With the engine off, begin with a careful visual and physical inspection. Check the negative battery terminal, the battery-to-body ground, the battery-to-engine cable, and any engine-to-body ground strap. Look for loose fasteners, green or white corrosion, swollen cable insulation, broken strands, overheated terminals, and terminals that can be rotated by hand.
Do not stop at the battery terminal. A cable can look clean at the battery while corrosion is hidden beneath the insulation or inside the terminal. Ground straps can crack internally, especially near their ends. An engine ground may be present but attached over paint, rust, oil residue, or a poorly repaired surface.
Also inspect grounds near the affected system. A headlamp problem may involve a ground behind the radiator support. A fuel pump issue may involve a body ground near the rear of the vehicle. Interior electronics can depend on ground points under the dash, kick panels, or center console. Factory wiring diagrams identify these locations and prevent random disassembly.
How to diagnose bad ground with a voltage-drop test
A voltage-drop test is the most reliable practical test for a suspect ground. It measures voltage lost across a connection while current is flowing. This matters because a ground can appear acceptable on a simple continuity test yet fail the moment a motor, starter, blower, or other load is switched on.
Set a digital multimeter to DC volts. Connect the black meter lead directly to the battery negative post, not the cable clamp. Touch the red lead to the ground point being tested. Then operate the circuit under normal load.
For example, when checking a starter ground path, place the red lead on a clean spot on the engine block and have an assistant crank the engine. A healthy connection should show very little voltage drop. A reading approaching several tenths of a volt during cranking deserves attention; a higher reading points to excess resistance between the engine and battery negative.
For a headlight, blower motor, or power window circuit, place the red lead at the component's ground wire or ground terminal while the component is commanded on. Generally, a low-current electronic ground should be very close to zero volts. Higher-current circuits may show a small amount of drop, but the exact acceptable value depends on the circuit and manufacturer specifications. The key is to test under load and compare the reading with the circuit's expected operation.
If the voltage drop is high, move the red lead step by step toward the battery negative terminal. Test the component ground terminal, then the ground bolt, then the body metal beside the bolt, then the body-to-engine strap, and finally the battery cable. The point where the reading changes sharply is where the resistance is hiding. This is how professionals isolate a bad connection instead of replacing parts on suspicion.
Why an ohm test is not enough
Checking resistance with the battery disconnected can identify an open wire, but it is not a final test for a high-resistance ground. A meter uses very little current in ohms mode. A corroded connection may pass that tiny test current and still fail when a starter needs hundreds of amps or a blower motor draws significant current.
Continuity testers can be even more misleading. Hearing a beep only confirms that some path exists. It does not confirm that the path can carry the required load. Use continuity as a preliminary check. Use voltage drop to make the repair decision.
Test the positive side too
A slow crank or weak accessory is not always caused by the ground side. The positive cable, fuse link, relay contacts, ignition switch, connector, or power feed can create the same complaint. A complete diagnosis checks voltage drop on both sides of the circuit.
For a starter, test from the battery positive post to the starter's main positive terminal while cranking, then test from the starter housing to the battery negative post. Comparing the two readings quickly shows whether the restriction is on the power side, ground side, or inside the starter itself. The same approach works for many motors and high-current accessories.
This is why replacing a battery or starter based on symptoms alone is risky. A new part installed behind a bad cable or ground connection can behave exactly like the old one.
Repair the connection correctly
Once the fault is confirmed, remove corrosion completely and inspect the terminal, cable, fastener, and mounting surface. Clean to sound metal where required, tighten the connection properly, and protect exposed connections with an appropriate terminal protectant. If the cable has internal corrosion, broken strands, heat damage, or an enlarged terminal, replacement is usually the correct repair.
Do not add a random jumper wire and call it finished. An added ground can mask the actual failure, create routing hazards, or bypass a designed ground path used by sensitive electronics. On vehicles with modules, sensor grounds, and network wiring, correct grounding location and proper repair methods matter.
When the problem needs professional electrical diagnosis
If a vehicle has repeated dead-battery issues, multiple module communication codes, intermittent no-starts, ABS or airbag warnings, or electrical symptoms that change with vibration or temperature, the ground fault may be buried inside a harness, connector, module splice, or prior repair. That is not the time for trial-and-error parts replacement.
Village Auto Electric has served Mesa drivers and referring repair shops since 1949 by finding the actual cause of difficult electrical problems. Paid diagnostic testing allows the technician to load the circuit, inspect wiring data, verify powers and grounds, and prove the failure before recommending a repair. We will NEVER replace parts you do not need.
If the symptoms are real but the cause is not obvious, leave the battery connected, avoid disturbing evidence, and have the circuit tested while the problem can still be reproduced. A precise voltage-drop test can turn an expensive mystery into a straightforward repair.

Comments